
Chain Link Fence Posts: Concrete Depth and Freeze-Thaw Setting in Washoe County
Chain link fence posts do almost all the work in a chain link fence. The mesh is just fabric; the posts carry the wind load, hold the tension, and decide whether the fence stands straight in ten years or leans by next spring. In Sparks and Reno, the posts face two local problems: high-desert wind and freeze-thaw cycles that heave shallow footings out of the ground. This guide walks through how to set posts the right way for Washoe County conditions, considering fence post frost depth and the steps involved.
Chain link is not a niche choice either. According to Global Growth Insights, chain link fencing accounts for nearly 34% of total fencing demand in the United States. That means plenty of installation advice is floating around online, and much of it was written for mild climates and soft soil. Our soil is alkaline, often compacted, and it freezes hard in winter. The steps below are adjusted for that.
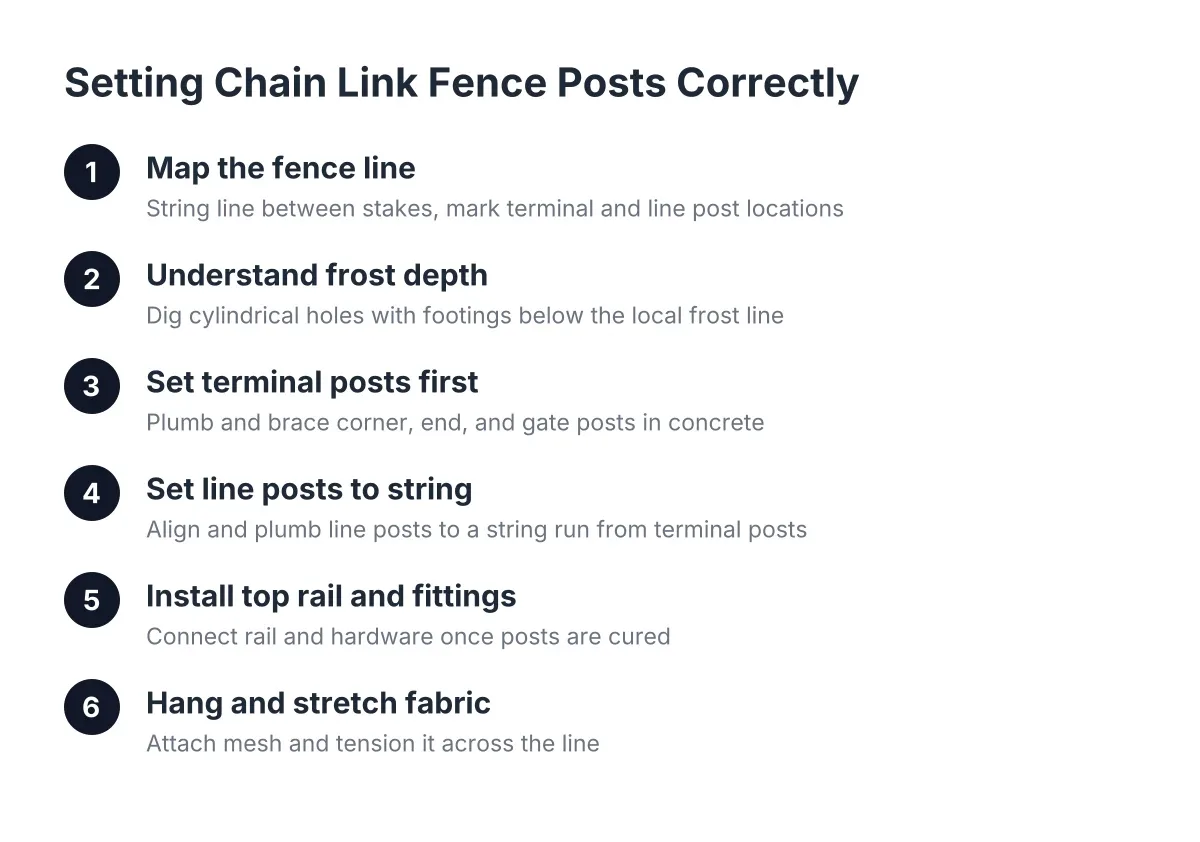
Step 1: Map the Fence Line and Mark Every Post Location
Start with a string line, not a shovel. Run mason's string between stakes at each corner and gate location. The string is your fence line; every post gets set to it.
Mark post locations along the string. Terminal posts go at every end, corner, and gate opening. Line posts fill the spans between them, spaced evenly, usually no more than ten feet apart. Closer spacing holds up better in Sparks wind, especially on open lots in Spanish Springs where gusts come across unbroken ground.
If you live in a planned community, settle the paperwork before the shovel comes out. Most HOAs in the Sparks and Reno area want a site plan showing the fence line, height, and material. Suppose a homeowner in a Spanish Springs subdivision sketches the post layout on a copy of the plot map and submits it with the fence height and coating color. That one page often prevents the resubmission cycle that stalls projects for weeks. Chain link is commonly restricted to side yards, back yards, or dog runs in planned communities, so confirm where it is allowed before you dig.
Also call 811 before any digging. Utility locates are free, and hitting a gas or irrigation line turns a fence project into a repair bill.
Step 2: Understanding Fence Post Frost Depth Below the Frost Line
Frost is the reason shallow-set posts fail here. Water in the soil freezes, expands, and pushes upward on anything buried in the frozen layer. A footing that sits inside that layer gets lifted a little each winter. After a few seasons, the post is high, loose, and leaning.
Therefore, dig every hole deep enough that the bottom of the concrete sits below the depth where Washoe County soil freezes. Your local building department can confirm the frost depth for your area; depths vary between the valley floor and higher ground. When in doubt, deeper is cheaper than redoing the fence. The fence post frost depth varies by location, but respecting that depth is what keeps footings stable through seasonal cycles.
Shape matters as much as depth. Dig each hole as a straight cylinder, not a cone. A cone-shaped hole, wide at the top and narrow at the bottom, leaves thin concrete around the lower post where strength matters most. A cone that narrows downward also gives frost a shape it can grip and lift. Keep the walls straight so the post gets consistent concrete thickness all the way down.
Washoe County soil adds its own difficulty. Older ranch lots often have compacted, rocky fill, and the alkaline soil hardens like pavement in late summer. A hand clamshell digger works in soft ground; a power auger or digging bar saves hours in hard ground.
Step 3: Set Terminal Posts in Concrete First
Terminal posts come first because the whole fence references them. These are the heavier-diameter posts at corners, ends, and gates, and they take the full pull of the stretched fabric.
Mix concrete to a firm, workable consistency and fill around each terminal post. Give the post generous concrete on all sides; a skinny collar of concrete around a post is where movement starts. Plumb the post with a level on two faces, check the height against your string line, and brace it so it cannot shift while the concrete sets.
One practice to rule out completely: tamping dirt back into the hole with no concrete footing. That shortcut fails under wind and water load, and it fails fastest in sandy or loose soil. A chain link fence in this area needs real footings.
A finishing detail worth copying: once the concrete sets, cap it with a thin layer of soil. Grass can then grow flush against the post, and the mower runs the fence line without a concrete collar showing.
How Deep Should Chain Link Fence Posts Be Set Below Frost Depth?
Chain link fence posts should be set in cylindrical concrete footings that extend below the local frost depth, with the hole wide enough to leave thick concrete on every side of the post. Terminal posts get deeper, wider footings than line posts because they carry the tension of the stretched fabric. Exact depths depend on fence height, post diameter, soil, and your local frost line, so confirm numbers for your specific site.
A few rules of thumb hold everywhere in Washoe County:
- Dig straight-walled, cylindrical holes, never tapered cones.
- Set the footing bottom below frost depth, not at it.
- Size terminal post footings larger than line post footings.
- Never backfill with tamped dirt alone; use concrete.
- Keep the post centered so concrete thickness is even all around.
Step 4: Set Line Posts to a String Line
With terminal posts cured and solid, run a tight string between them near the top. This string sets both the alignment and the height of every line post.
Next, set each line post in its concrete footing, plumb it, and bring the top to the string. Line posts sit lower than terminal posts because the top rail passes over them through loop caps. Check plumb twice on each post, on two faces, before moving on. A post that is a half inch out of plumb looks fine in the hole and obvious once the fabric goes on.
Here is the part most first-timers get wrong: patience. Concrete needs time to cure before anything pulls on those posts. Stretching fabric against green footings rocks the posts loose, and a post loosened in fresh concrete rarely tightens back up on its own. Waiting a few days costs nothing; redoing footings costs a weekend.
Step 5: Install the Top Rail and Fittings
Slide tension bands and a brace band onto each terminal post before the caps go on; they will not fit afterward. Then set post caps on terminal posts and loop caps on line posts.
Feed the top rail through the loop caps, joining sections with their swaged ends, and connect the rail to the terminal posts with rail end cups on the brace bands. The top rail ties every post together into one frame, which is what lets a chain link fence shrug off the wind that works a wood fence apart board by board. If your layout matches a standard chain link fence installation diagram, this stage goes fast; the fittings only assemble one way.
Step 6: Hang and Stretch the Fabric
Unroll the chain link fabric along the outside of the frame. Thread a tension bar through the end row of diamonds and bolt it to the tension bands on the first terminal post.
Stretch the fabric toward the far terminal post with a come-along and a stretcher bar. Pull until the diamonds barely give when squeezed by hand, then thread the second tension bar, bolt it off, and trim the excess fabric by unwinding a strand. Tie the fabric to the top rail and line posts with aluminum ties, spaced evenly.
This is the step where professional chain link fence installation earns its keep. Getting even tension across a long run, around a corner, or on a slope takes technique and a second set of hands. Uneven tension shows up as sag within the first windy season.
Step 7: Check the Work and Plan for Repairs Down the Road
Walk the line when you finish. Every post should be plumb, every footing buried, and the fabric tight with no ripples. Fix small issues now; they grow.
Even a well-set fence can take damage later. A vehicle backs into a corner post, or a falling limb crushes a section of rail. However, localized damage usually means a repair, not a replacement. One useful fact for anyone pulling a damaged post: footings poured within the last year grip hard, while older footings often pop out with far less fight. That changes how a crew approaches a post swap, and it is one reason chain link fence post removal is quoted after someone looks at the footing, not over the phone.
Cost on repairs follows the same logic as installation. The drivers are post depth and diameter, footing condition, access along the fence line, and how much fabric has to come down to reach the damage. In tight spots, say a post that butts against a neighbor's existing fence, a reinforced setup using a metal pipe with sleeves can solve a problem that a standard post cannot.
A local fence company that works Sparks and Reno lots every week has already fought this soil, this wind, and these winters. If your project involves slopes, gates, hard rock, or an HOA submission you cannot afford to have bounced, bringing in a crew for the post-setting alone is a reasonable middle path. The posts are the fence. Set them below frost, in straight-walled concrete footings, and the rest of the job follows.
If you need chain link fence installation, Reno Sparks Fence Pros can help.
Prefer to talk it through? Call (775) 369-4729 — a quick call is usually the fastest way to get a straight answer for your situation.