
Wrought Iron Fence Maintenance Schedule: Preventing Rust Through Nevada Winters
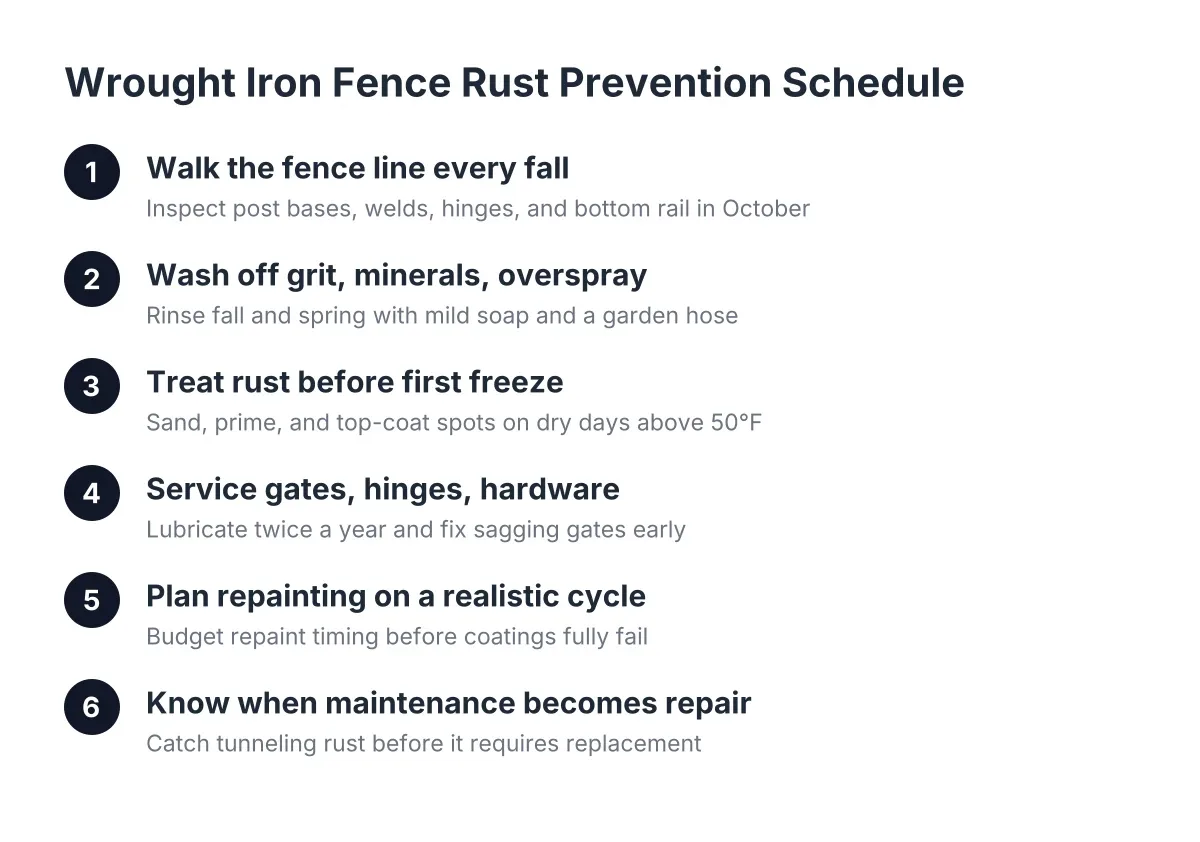
A wrought iron fence can outlast every wood fence on the block, but only if someone stays ahead of rust. Iron fence rust prevention is especially critical in Washoe County, where the enemy is not just moisture. It is the freeze-thaw cycle that opens hairline cracks in paint, the high-desert wind that sandblasts coatings, and sprinkler overspray that keeps the bottom rail wet all summer. This guide lays out a wrought iron fence maintenance schedule built for Sparks and Reno conditions, step by step, so you can prevent rust before it becomes a repair bill.
This matters double if you answer to an HOA or manage one. A rusting iron fence along a community perimeter or pool enclosure draws violation letters, and deferred corrosion can turn a touch-up year into a replacement year in the reserve budget. The schedule below works for a single backyard fence or a multi-phase community perimeter; the steps are the same, only the scale changes.
Why Nevada Winters Threaten Iron Fence Rust Prevention
Iron does not rust in dry air. It rusts where water sits against bare metal, and Washoe County winters create exactly those conditions. Daytime snowmelt refreezes overnight, and that expansion pries paint loose at welds, post bases, and picket joints. Each cycle widens the gap a little more.
In addition, our alkaline soil and hard water leave mineral deposits where sprinklers hit the fence. Those deposits hold moisture against the coating. Wind-driven grit scours the paint on exposure faces, usually the south and west sides, thinning the barrier that keeps oxygen off the metal. Understanding how to prevent rust requires attention to these specific moisture and environmental pathways.
The result is predictable. Rust almost always starts in the same spots: where pickets meet the bottom rail, at gate hinges and latches, at weld points, and at the base of posts where snow piles and sprinklers spray. Your maintenance schedule should target those spots first, not the broad flat faces that rarely fail.
Step 1: Walk the Fence Line Every Fall
Do a full inspection in October, before the first hard freeze. Walk the entire run slowly and look at every post base, weld, and gate. Bring a notepad or your phone and photograph anything questionable so you can compare year to year.
Check these points on every pass:
- Post bases, where snow and sprinkler water pool
- Welds joining pickets to rails, the most common first failure point
- Gate hinges, latches, and the strike area where metal rubs metal
- The bottom rail, which sits closest to wet soil and splash-back
- Any spot where a tree branch, shrub, or vine touches the fence
- Chipped, bubbled, or chalky paint anywhere on the run
Bubbling paint is the one that fools people. The surface looks intact, but rust is already forming underneath and lifting the coating. Press on any bubble; if it flakes or crunches, mark it for treatment in Step 3.
For HOA boards and property managers, this fall walk is the inspection to fold into the annual reserve-fund cycle. Documenting the fence condition with dated photos gives the board a defensible record and makes next year's budget conversation shorter.
Step 2: Wash Off Grit, Minerals, and Overspray Residue
Wash the fence once in fall and once in spring with mild dish soap, water, and a soft brush. The goal is removing three things: wind-blown grit that abrades paint, mineral scale from sprinkler overspray, and general grime that traps moisture. Rinse with a garden hose, not a pressure washer; high pressure forces water into joints and strips sound paint.
Pay extra attention to the sprinkler side of the fence. Hard-water scale builds in thin white rings, and each ring holds a film of moisture against the coating for hours after every irrigation cycle. While you are at it, adjust any sprinkler head that hits the fence directly. Redirecting one head costs nothing and removes the single biggest year-round moisture source most Sparks yards have.
Dry the fence with a towel or let the wind do it on a warm afternoon. Never let standing droplets sit on horizontal rails going into a freezing night.
Step 3: Treat Rust Spots Before the First Freeze
Catch rust in the surface stage and the fix is cheap. Let it tunnel under the paint through a winter and you are into wrought iron fence repair instead of maintenance. Here is the treatment sequence for any spot you flagged in Step 1:
- Sand or wire-brush the spot down to clean metal. Remove every trace of orange and all loose paint around the edge.
- Wipe the area with a rag and let it dry fully.
- Apply a rust-converting primer or a rust-inhibiting metal primer. Converters chemically neutralize residual oxidation; either works if the surface prep was honest.
- Top-coat with an exterior paint made for metal, matched to the fence color. Two thin coats beat one thick coat.
Timing matters in our climate. Do this work on a dry day above fifty degrees, and finish early enough that the paint cures before evening temperatures drop. September and early October are the window; by November you are gambling with cure times.
If your fence is in an HOA community, check your governing documents before changing anything visible. Most associations treat color as an architectural standard, so matching the existing black or bronze exactly keeps you out of the violation queue. Touch-up in the approved color rarely needs a submission; a color change almost always does.
Step 4: Service Gates, Hinges, and Hardware
Gates fail before fence panels do, because they are the only part that moves. Twice a year, lubricate hinges and latches with a silicone or lithium-based lubricant. Avoid dripping oils that streak the paint below.
Next, check the gate for sag. A sagging gate grinds its latch, scrapes paint off the strike plate, and exposes bare metal that rusts within one wet season. Tighten hinge bolts, and if the gate still drags, the post may be shifting; frost heave in Washoe County soil moves gate posts more than people expect. A shifting post is a structural fix, not a lubrication fix, and it is worth having a local fence company look at it before the gate racks the adjacent panel.
Wrought iron gate maintenance matters most on pool enclosures. Self-closing hinges and self-latching hardware are code-driven safety components, and a rusty or sticky latch is a compliance problem, not just a cosmetic one. Property managers scheduling a pool fence audit should test every gate's self-close and self-latch action as part of this step.
Step 5: Plan Repainting on a Realistic Cycle
Even well-kept coatings wear out. Plan on a full repaint roughly every several years, with the exact interval depending on sun exposure, sprinkler contact, and how faithfully you did the fall touch-ups. South- and west-facing runs in open subdivisions fade and chalk faster than shaded runs; let the fence tell you, not the calendar alone.
A full repaint follows the same logic as spot treatment, scaled up: wash, sand or scuff the whole surface, prime any bare metal, and apply two finish coats. On a long community perimeter, this is a phased project. For example, suppose an HOA in Spanish Springs manages a shared perimeter around a 200-home community. In that scenario, the board might repaint the high-visibility street frontage in year one and the interior common-area runs in year two, spreading the reserve-fund hit across two cycles while keeping the sections residents see most looking sharp. Installers think the same way on mixed jobs, putting the cleanest work where it is most visible.
Decorative wrought iron fence panels with scrollwork or finials take longer to prep and paint than plain picket panels, since every curve is a surface. Budget more labor per foot for ornamental sections when planning the cycle.
When Maintenance Becomes Repair
Know the line between a brush-and-paint fix and a structural problem. Call a professional when you see any of these:
- Rust that has eaten through a picket or rail, leaving holes or thin, flaking metal
- A post that moves when you push on it, usually frost heave or a failed footing
- Broken welds, especially on gates or pool fencing
- Panels bent by vehicle contact, falling limbs, or snow-removal equipment
Section replacement is often the honest answer once metal has thinned. One advantage of a wrought iron fence is that repair can be surgical; a single panel or picket can be cut out and replaced without touching the rest of the run. Compare that to a wood fence, where posts rot from the inside even when the panels look fine, and the fix tends to spread.
There is a limit to what paint can save. If more than a small fraction of the run shows through-rust, patching becomes a losing cycle, and a frank conversation about replacement, possibly in powder-coated steel or aluminum, serves the budget better than another repaint.
A Year-Round Wrought Iron Fence Maintenance Calendar
Here is the whole schedule in one place, tuned to the Reno and Sparks seasons:
- September to October: Full inspection walk, wash, spot-treat rust, prime and paint while cure temperatures hold. Lubricate gate hardware.
- November to February: Keep snow from piling against post bases where you can. Do not use ice-melt salts near the fence line; chlorides accelerate corrosion.
- March to April: Second wash to remove winter grime. Re-check every spot you treated in fall; freeze-thaw will have found any weak repair. Lubricate gates again.
- May to August: Fix sprinkler overspray, trim plants off the fence, and watch the bottom rail on irrigated lawns. Handle any touch-ups in the dry heat, when cure conditions are ideal.
Consistent iron fence rust prevention care is boring, and that is the point. Two washes, one inspection, a handful of touch-ups, and gate lubrication each year will keep an iron fence solid through decades of Nevada winters. Skip three years and the freeze-thaw cycle starts collecting interest. For HOA planners, putting this calendar in the association's maintenance plan turns fence care from a surprise expense into a line item, which is exactly where it belongs.
Prefer to talk it through? Call (775) 369-4729 — a quick call is usually the fastest way to get a straight answer for your situation.