
Wood Fence Post Replacement in Washoe County: Concrete Depth and Soil Facts
A leaning fence line in Sparks or Reno almost always traces back to the posts, not the boards. Wood fence post replacement is the repair that matters most, because the post is the structural part; everything else hangs off it. The trouble is that what works in other climates fails here. Washoe County's alkaline soil, high-desert wind, and freeze-thaw winters punish posts that were set too shallow, backfilled wrong, or surrounded by concrete that traps water against the wood. This guide walks through the replacement process step by step, with the depth, backfill, and soil decisions explained for local conditions. Understanding the proper fence post concrete depth is essential to prevent posts from heaving and leaning.
If you manage rental units or you are planning a fence project that has to pass an HOA review, the stakes are the same. A post that fails in two winters means a second repair bill, or a violation notice when the fence starts leaning over a neighbor's side yard. Done right, a replaced post should outlast the boards attached to it.
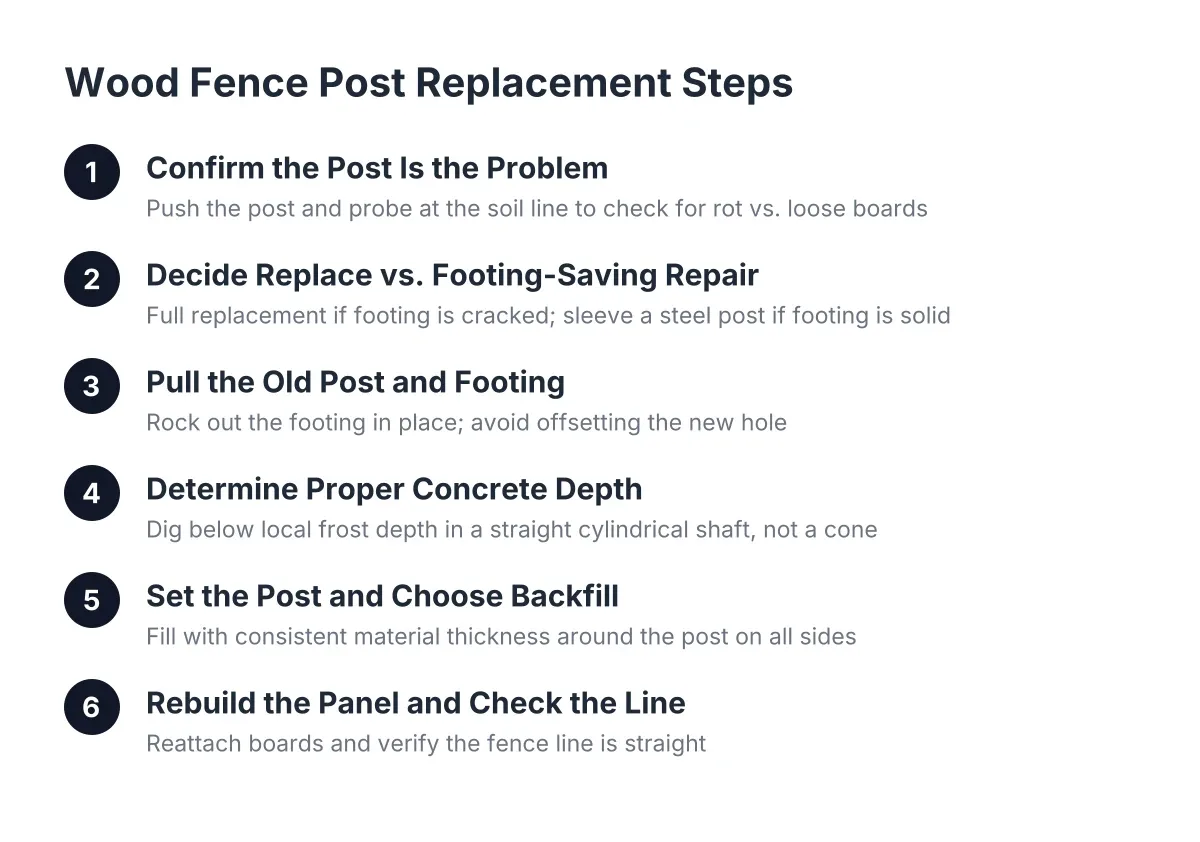
Step 1: Confirm the Post Is the Problem, Not the Boards
Before you dig anything, figure out what actually failed. Grab the post at chest height and push. If the whole section moves at the ground, the post or its footing is the problem. If the post holds firm but boards rattle, you have a wood fence repair job instead, which is cheaper and faster.
Next, check the post at the soil line. Probe the wood with a screwdriver right where it enters the ground. Soft, spongy wood means rot. In Reno and Sparks, rot concentrates in that first few inches below grade, where freeze-thaw cycles pump moisture against the post all winter. The top of the post can look perfect while the base has the strength of cardboard.
According to Angi, wood fences last about 15 years on average, up to 20 depending on wood type, climate, and pest exposure. Posts set wrong in alkaline high-desert soil tend to fail earlier than that, which is why the setting method in the later steps matters more than the lumber grade.
Step 2: Decide Between Full Replacement and a Footing-Saving Repair
Full wood fence post replacement is not always the right call, and this is where most homeowners guess wrong. The first instinct is to rip out the post and its concrete footing and start over. Sometimes that is right. Often it is not.
If the post rotted at ground level but the concrete footing is solid and plumb, there is a smarter option. Cut the old post off above the rotted section and set a new steel post into the original footing. This preserves a footing that already survived local freeze-thaw cycles, and it skips the hardest part of the job, which is breaking out old concrete.
Here is the practical decision rule:
- Footing is cracked, heaved, or leaning: full replacement. Dig it all out.
- Footing is solid, post rotted at grade: cut and sleeve a steel post into the existing concrete.
- Post is sound but loose in the hole: re-set and re-backfill; the post may be reusable.
- Multiple posts failing along one run: plan a section rebuild rather than chasing posts one at a time.
An interim repair that preserves the footing also keeps a sagging fence standing now, while letting you plan a full rebuild with steel posts later. For a landlord juggling turnover inspections across three Sparks properties, that staging decision is often the difference between an emergency and a scheduled job. Repair kits and brackets sold for wood fence post repair work on the same principle, though they are a stopgap, not a fix for a rotted base.
Step 3: Pull the Old Post and Footing
If you decided on full replacement, the old footing has to come out. Do not dig a new hole beside the old one; offsetting the post throws off panel spacing and gives an HOA reviewer a crooked line to flag.
Dig around the footing until you can rock it. A post removal tool, a farm jack, or a lever built from a long 4×4 and a chain all work; tool rental yards around Reno carry post pullers if the footing is heavy. Expect the concrete to weigh more than it looks like it should. If the old post snapped at grade, you may need to dig the full depth by hand because there is nothing left to grip.
One honest trade-off: pulling footings near irrigation lines, low-voltage lighting, or a shared property-line fence is where DIY jobs go sideways. Call for utility locates before digging, and if the fence sits on a boundary you share with a neighbor or an HOA common area, settle that conversation before the hole is open.
How to Determine Proper Fence Post Concrete Depth
Depth is where Washoe County conditions set the rules. The hole has to reach below the local frost depth, because soil that freezes and thaws will grab a shallow footing and lift it a little each cycle. That heaving is why fences in newer Spanish Springs subdivisions sometimes lean after only a few winters; the posts were set for a milder climate.
Shape matters as much as depth. Dig a straight cylindrical shaft, not a cone that is wide at the top and narrow at the bottom. A cone-shaped hole leaves thin concrete at the base, exactly where the post needs the most support, and the flared top gives frost more surface to grab. A clamshell digger or rented auger cuts a clean cylinder; a shovel tends to cut a cone.
Width follows from the post. The post needs a generous ring of material around it on every side, all the way down. A hole barely wider than the post cannot be backfilled properly, no matter what you pour in it. More concrete alone does not make a post stable; consistent thickness in a properly shaped hole does.
Wind is the other local factor. Sparks and Reno fence lines take sustained high-desert gusts, and a six-foot privacy fence acts like a sail. When digging a hole to the appropriate fence post concrete depth, remember that a post which would hold a four-foot picket fence in a sheltered yard will work loose under a tall solid panel here. When in doubt, go deeper rather than wider.
Step 5: Set the Post and Choose Your Backfill
This step decides how long the new post lasts. You have two sound options, and one that fails inspection everywhere.
Concrete backfill is the standard. Brace the post plumb, pour concrete around it in the cylindrical hole, and crown the top so water sheds away from the wood. The known weakness: concrete can trap moisture against a wood post and speed up rot at the collar. Crowning the surface and keeping sprinkler spray off the post line reduces that risk. A common finishing detail is a thin layer of soil over the cured concrete so grass grows flush along the fence line.
Stone dust or crushed stone backfill drains instead of trapping water. Compacted in lifts around the post, it locks tight while letting moisture move away from the wood, which lowers the rot risk that kills posts here. The trade-off is labor; proper compaction takes time, and in loose sandy soil it holds less stiffly against wind than concrete.
Tamped dirt alone is not acceptable. Backfilling with nothing but the soil that came out of the hole is a shortcut that will not hold a fence through a Washoe County winter, and no competent crew does it.
Brace the post with stakes in two directions and check plumb twice before anything sets. A post that cures one degree off plumb telegraphs down the whole panel run, and that is the kind of detail an HOA architectural review catches in a drive-by.
Step 6: Rebuild the Panel and Check the Line
Once the footing cures, reattach rails and boards. Match board height and style to the adjacent panels. For homeowners in planned communities, this is the compliance moment: if your HOA guidelines call out a specific height, cap detail, or stain color, a replaced post section has to match or you risk a notice even though you fixed a safety problem. Say a homeowner in a Spanish Springs HOA replaces two posts and rebuilds a panel an inch taller than the approved spec; in that scenario, the repair itself can trigger a violation letter. Measure the existing fence before you rebuild, not after.
Sight down the fence line from the end post. Rails should run straight, and the new post should disappear into the line. If it stands proud or sits back, fix it before the boards go on.
What Wood Fence Post Replacement Costs Depend On
Costs for replacing wood fence posts in Reno and Sparks turn on a handful of factors, not a flat per-post price. The biggest drivers are how many posts failed, whether old footings must be broken out, access for equipment, soil conditions at the hole, and whether the job is a single post or a staged repair across several rental properties. According to Angi, wood fence repair costs range from $300 to $925, with average costs around $600, and catching post damage early keeps you on the repair side of the ledger rather than the full-replacement side.
A few factors that move the number up or down:
- Footing removal: breaking out old concrete adds labor over setting into a clean hole.
- Post count and spacing: several posts on one run cost less per post than scattered singles.
- Access: a backyard reachable only through a gate means hand digging instead of an auger.
- Material choice: steel posts cost more upfront than wood but end the rot cycle at the footing.
- Batching: landlords with units in Sparks, Reno, or Sun Valley often schedule post work across properties in one visit, which spreads mobilization cost.
When to Bring in a Local Fence Company
Replacing one post with good access is a manageable weekend job for a handy owner. Call a local fence company when posts are failing along a shared property line, when the fence is tall and wind-loaded, when footings sit near utilities, or when an HOA deadline means the repair has to pass review the first time. A crew that sets posts in Washoe County soil year-round already knows the proper fence post concrete depth for local conditions, the backfill choice for your soil, and what local HOA specs usually require, which is exactly the judgment that keeps a wood fence post replacement from becoming a repeat repair in 2028.
If you need wood fence repair, Reno Sparks Fence Pros can help.
Prefer to talk it through? Call (775) 369-4729 — a quick call is usually the fastest way to get a straight answer for your situation.